Introduction
Deploying a Next.js application to production requires a streamlined process that ensures the application is built correctly and deployed to a reliable hosting environment. Azure DevOps provides a powerful set of tools to automate these processes, ensuring efficient deployment of your Next.js app. This guide walks you through the steps to deploy your Next.js app using Azure DevOps.
Configuring the Next.js Project
To prepare your Next.js app for deployment, follow these steps:
1. Update next.config.js
In your next.config.js, include the output configuration as standalone to ensure your app is built as a standalone bundle:
const nextConfig = {
  reactStrictMode: true,
  output: 'standalone', // Add this line
  // ... other configurations
};

module.exports = nextConfig;
1. Build the Next.js App
Run the command npm run build to build your Next.js app. After the build, you’ll find a new folder named standalone within the .next directory.

3. Copy Required Folders
Copy the following folders into the standalone folder:
- Copy the
publicfolder into./next/standalone. - Copy the
.next/staticfolder into./next/standalone/static.
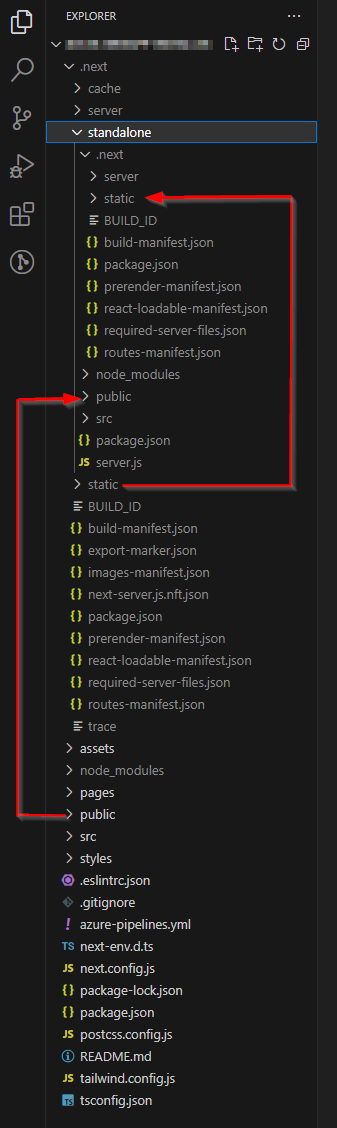 This step ensures that all the necessary assets are correctly placed for deployment.
Running the Standalone Build
To confirm that your standalone build works as expected, follow these steps:
- Open a command prompt within the
standalonefolder. - Run the command
node server.jsto start the server. - Open a web browser and navigate to
localhost:3000to ensure that the website functions properly.
Remember that only the content of the standalone folder will be deployed.
Setting up the Azure DevOps Pipeline
Follow these steps to create a deployment pipeline in Azure DevOps:
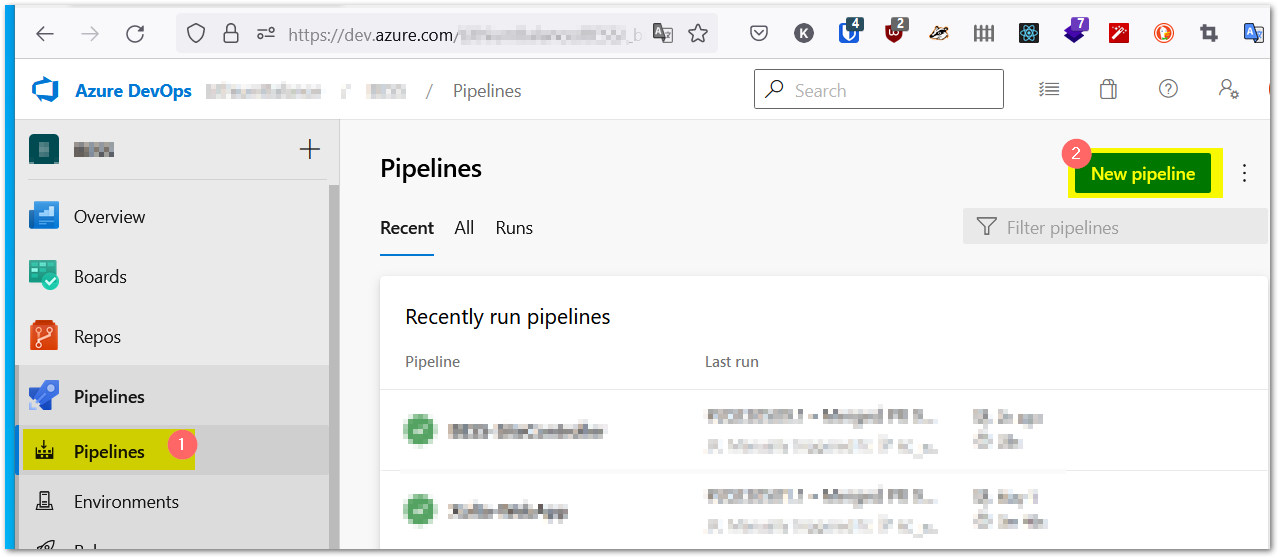
1. Create a New Pipeline
-
Go to Azure DevOps and navigate to Pipelines, then click on “New Pipeline”.
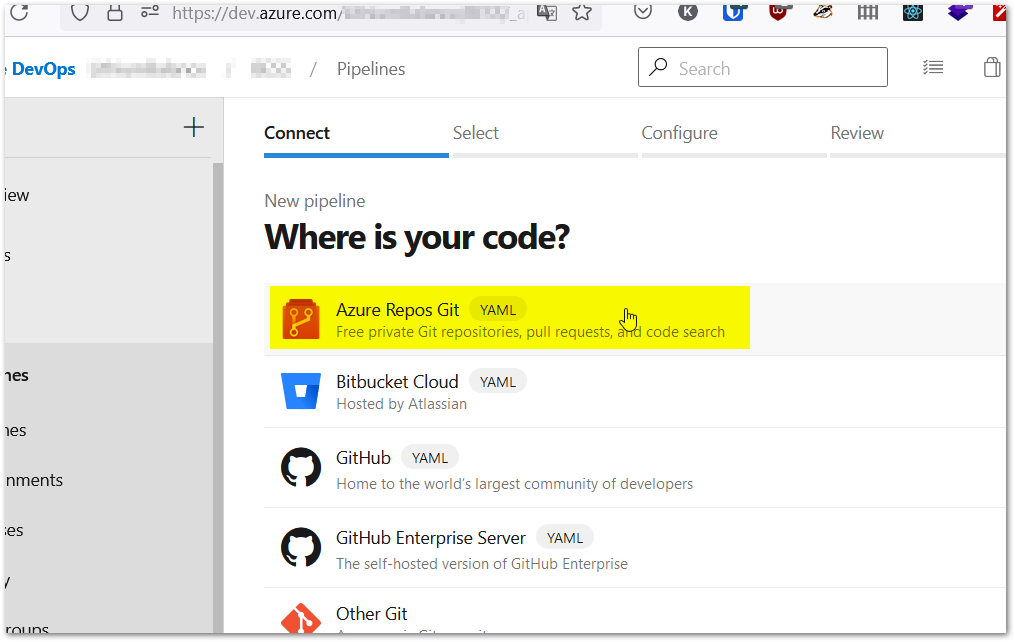
-
Select “Azure Repos Git” as the source.
-
Choose your repository.
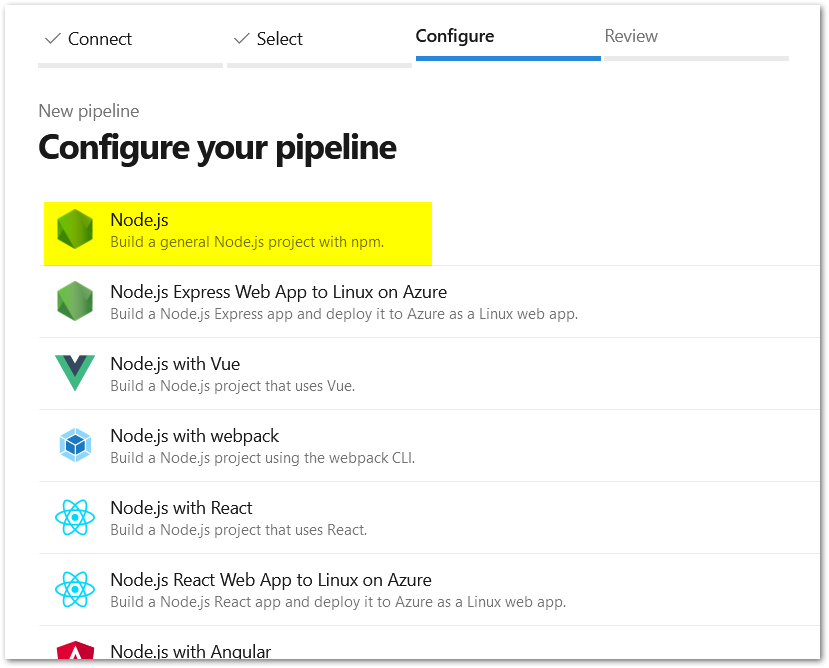
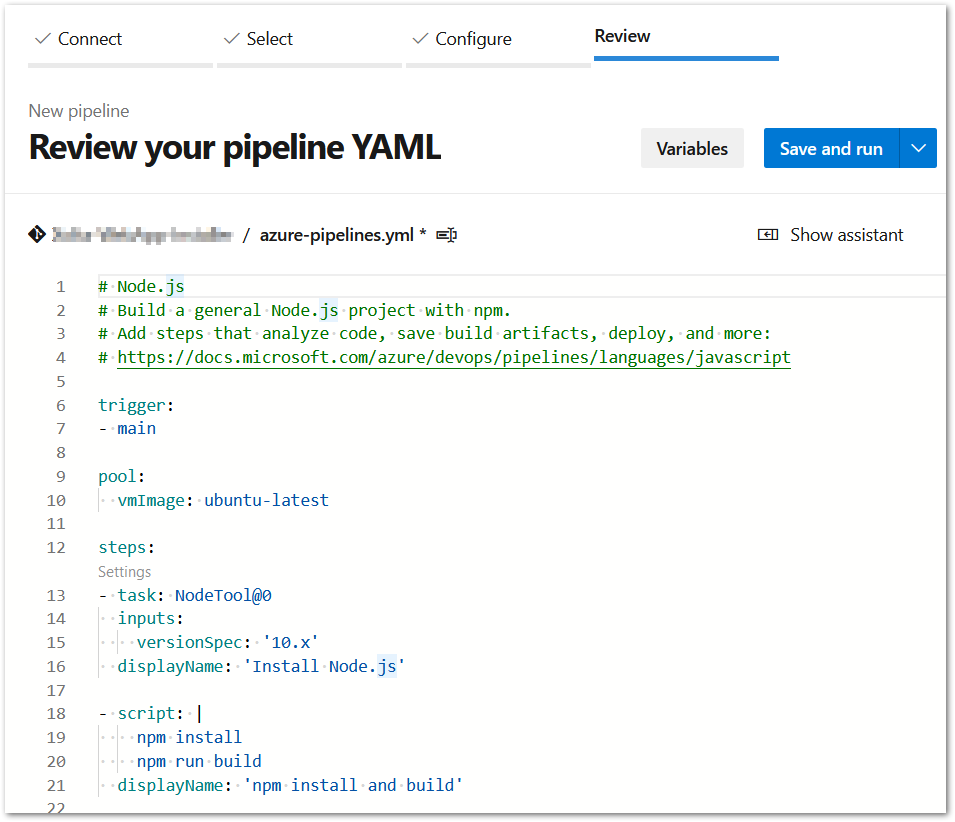
2. Select Node.js and Configure
In the configuration section, select “Node.js” as the template.
Review the generated YAML code and click “Save and run”. You can edit the configuration later if needed.
 You can edit the config file now or later. If you do later then you have to check-in the changes.
Here’s an example YAML configuration:
trigger:
  - none

pool:
  vmImage: ubuntu-latest

steps:
  - task: NodeTool@0
    inputs:
      versionSpec: '18.x'
    displayName: 'Install Node.js'

  - script: |
      npm install
    displayName: 'npm install'

  - task: Cache@2
    displayName: 'Cache .next/cache'
    inputs:
      key: 'next | $(Agent.OS) | package-lock.json'
      path: '$(System.DefaultWorkingDirectory)/.next/cache'

  - script: |
      npm run build
    displayName: 'npm build'

  - task: CopyFiles@2
    displayName: 'Copy standalone'
    inputs:
      sourceFolder: '$(Build.SourcesDirectory)/.next/standalone'
      Contents: '**'
      TargetFolder: '$(Build.ArtifactStagingDirectory)/standalone'

  - task: CopyFiles@2
    displayName: 'Copy public'
    inputs:
      sourceFolder: '$(Build.SourcesDirectory)/public'
      Contents: '**'
      TargetFolder: '$(Build.ArtifactStagingDirectory)/standalone/public'

  - task: CopyFiles@2
    displayName: 'Copy .next/static'
    inputs:
      SourceFolder: '$(Build.SourcesDirectory)/.next/static/'
      Contents: '**'
      TargetFolder: '$(Build.ArtifactStagingDirectory)/standalone/.next/static'

  - task: ArchiveFiles@2
    inputs:
      rootFolderOrFile: '$(Build.ArtifactStagingDirectory)/standalone'
      includeRootFolder: false
      archiveType: 'zip'
      archiveFile: '$(Build.ArtifactStagingDirectory)/$(Build.BuildId).zip'
      replaceExistingArchive: true

  - task: PublishPipelineArtifact@1
    displayName: 'Publish artifact'
    inputs:
      targetPath: '$(Build.ArtifactStagingDirectory)/$(Build.BuildId).zip'
      artifact: '********'        <-- give your own name
      publishLocation: 'pipeline'
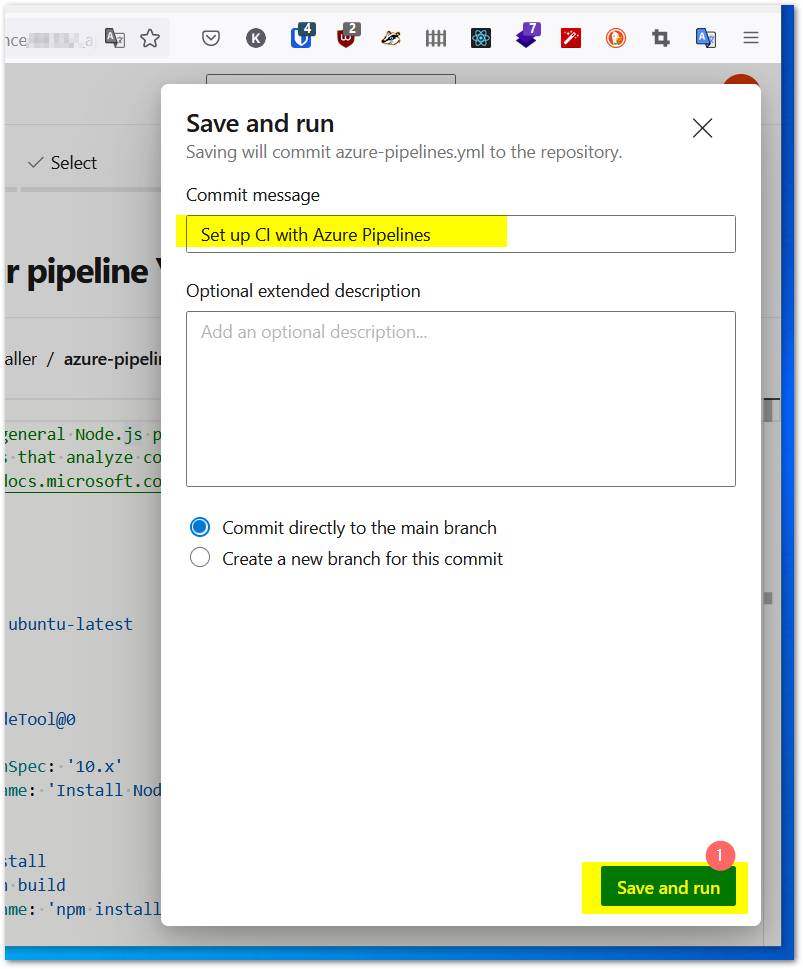
give a commit message and click ‘save and run’
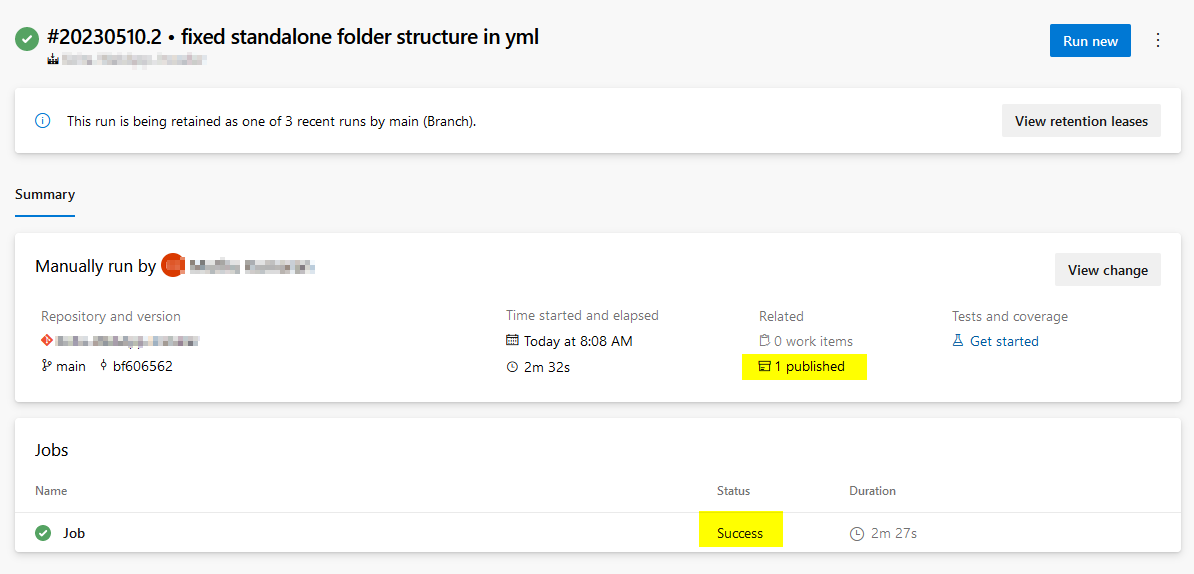
it’s running, once done you can see success tick and published artifact.
3. Create the Azure App Service
In azure, we have to create a new App service
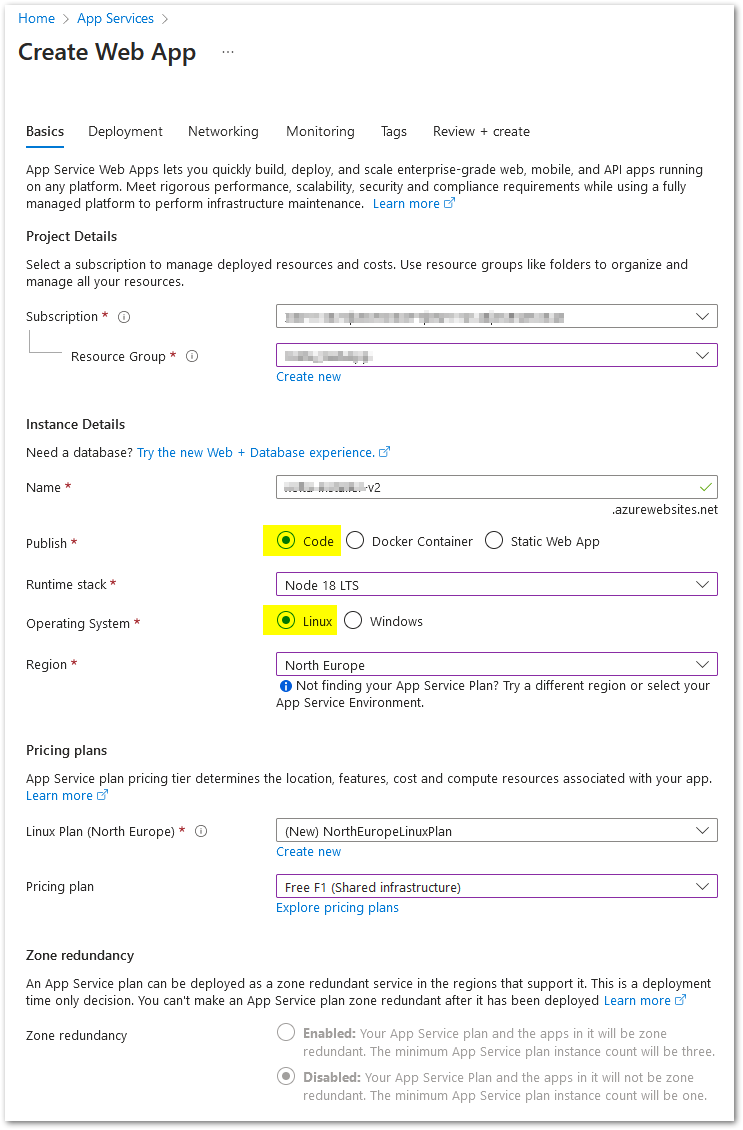
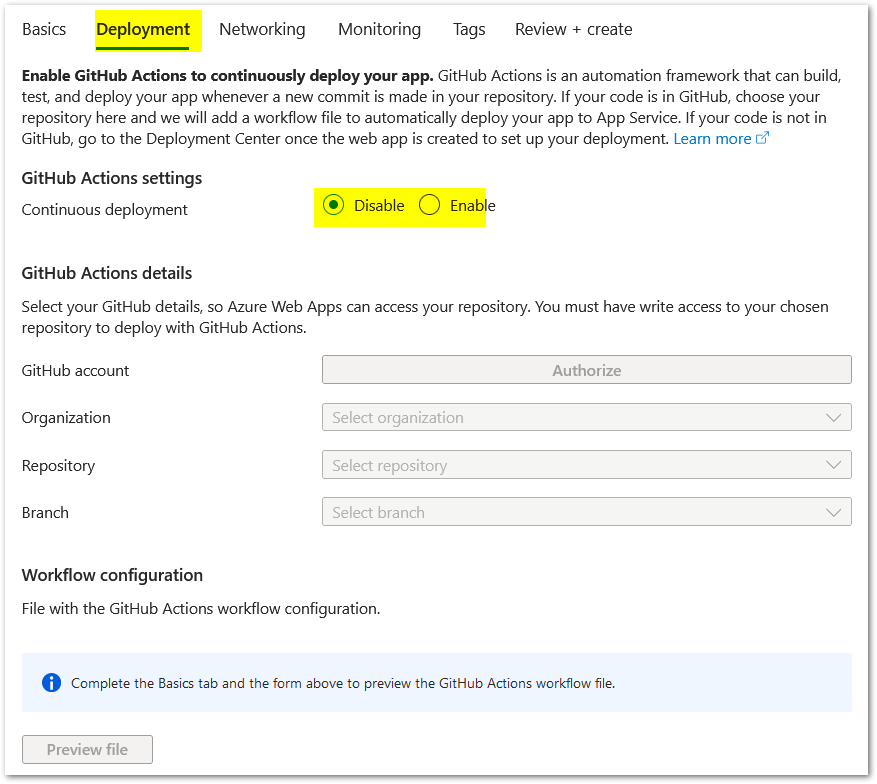
In the next deployment tab, select disable, because we are not using GitHub’s action.
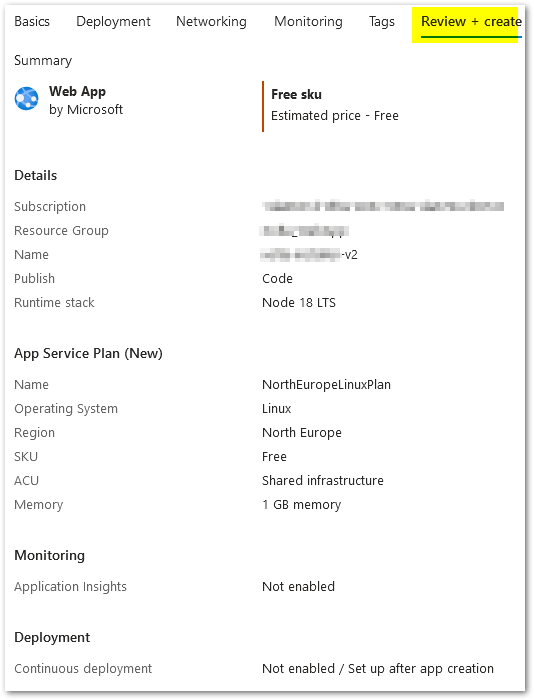
Below is the final review+create screen for full information.
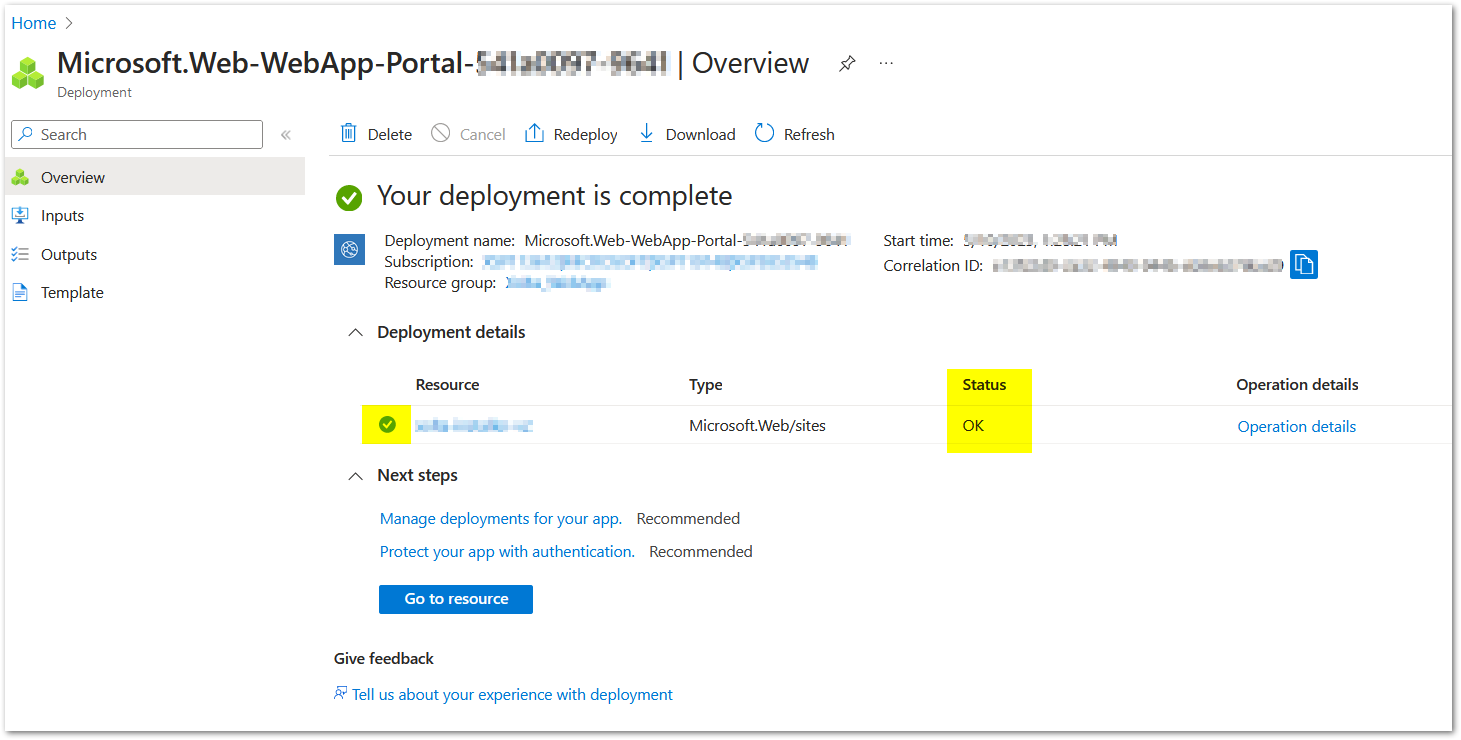
Once the service is created, you can see the running status.
Create slots for staging
I already created app service with free plan which doesn’t support slots, so I changed to paid plan (Standard S1). So Before continue slots, you have to change your app service plan to paid one.
Open the created app service, go to deployment slots section, add slot.
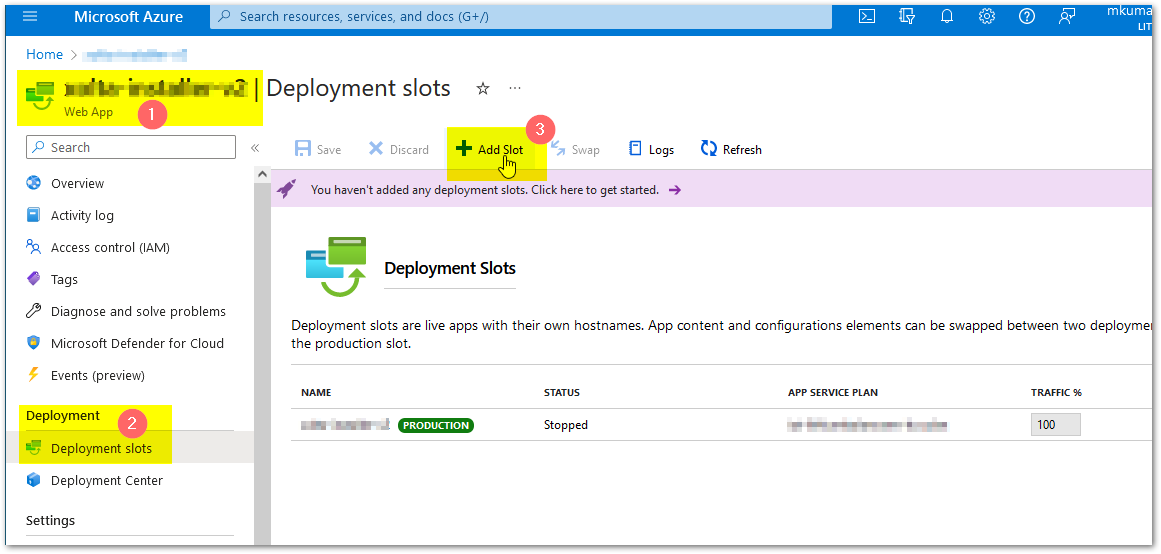
- Give a name for the slot.
- Select the main app service in the clone settings dropdown.
- Click add.
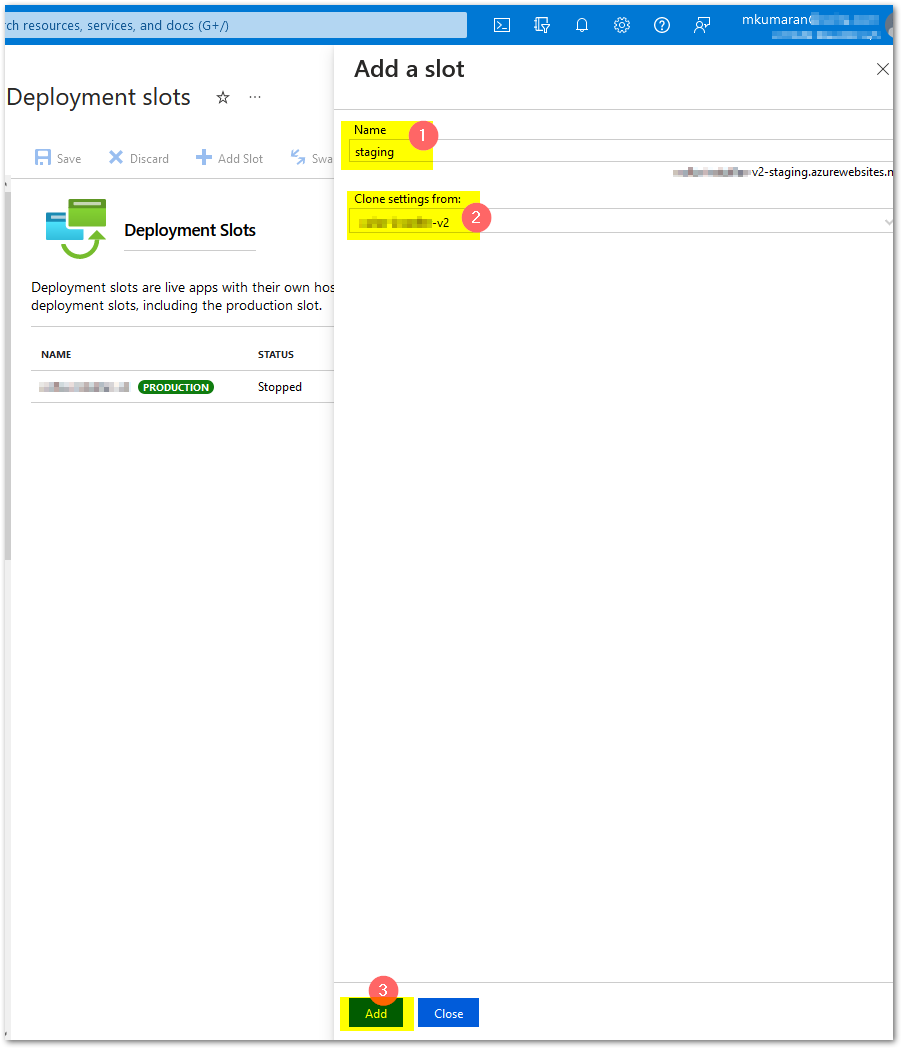
Once that’s done, we can see one more app service with slot

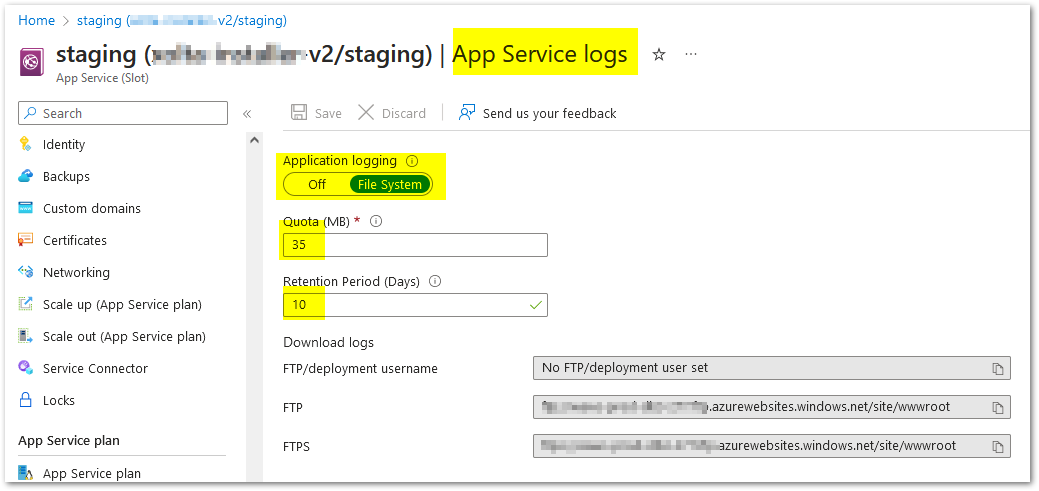
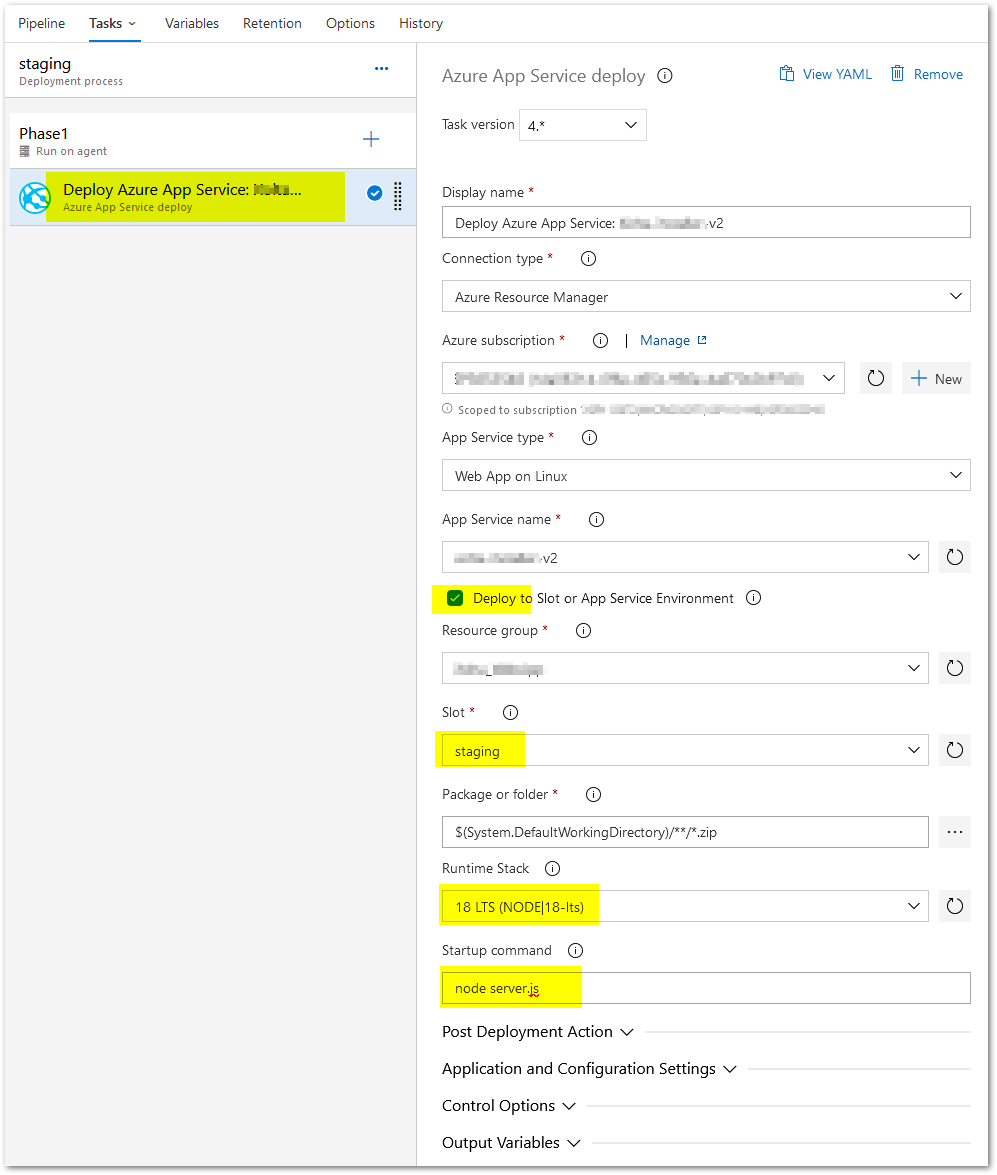
Give startup command in both stagin and production slots.

Below settings to view the container logs
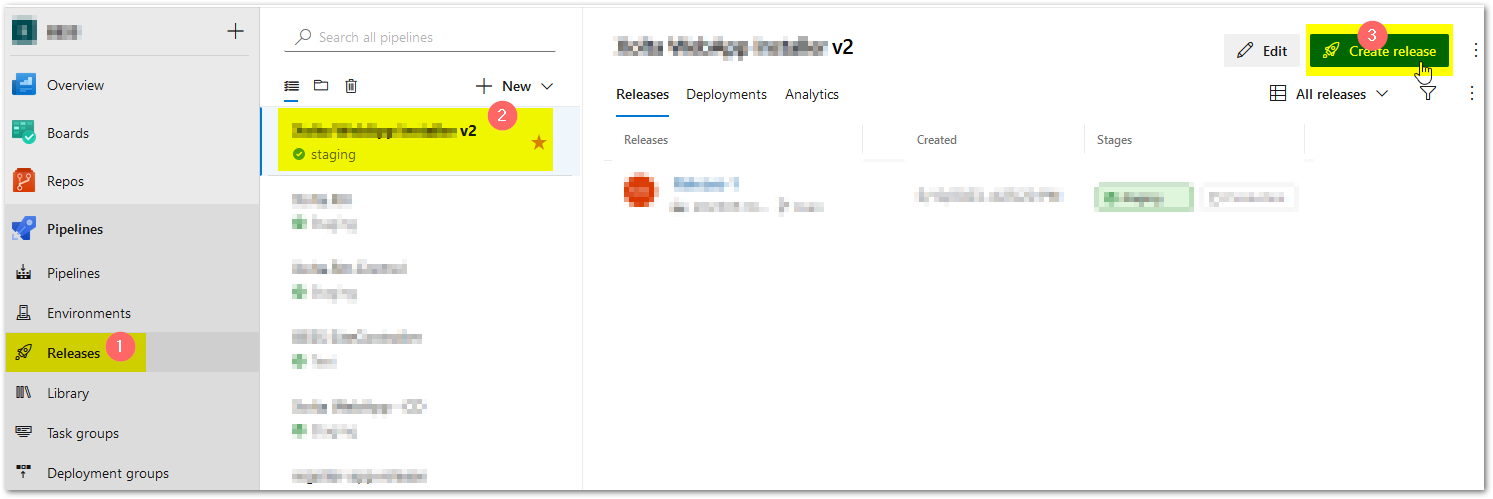
Create new Release
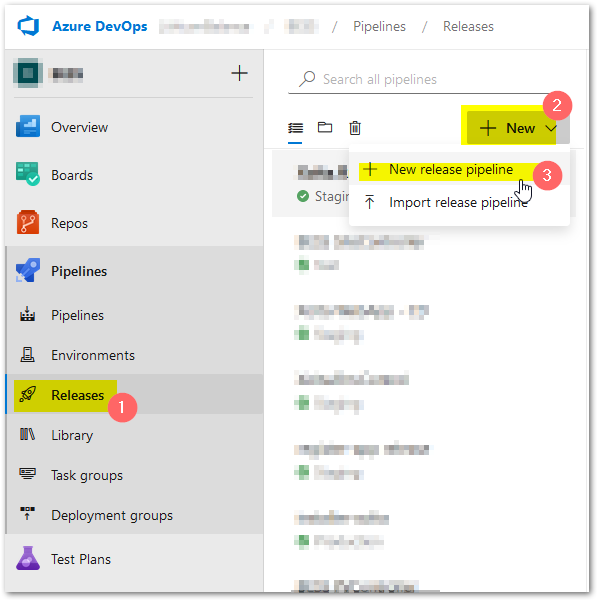
Create staging release pipeline
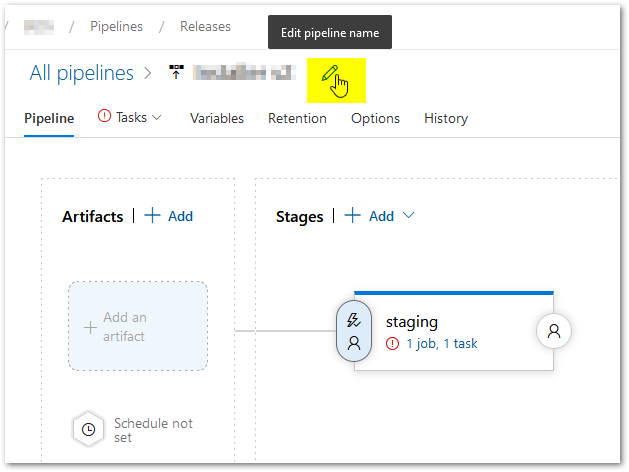
Click Release, and new then New release pipeline
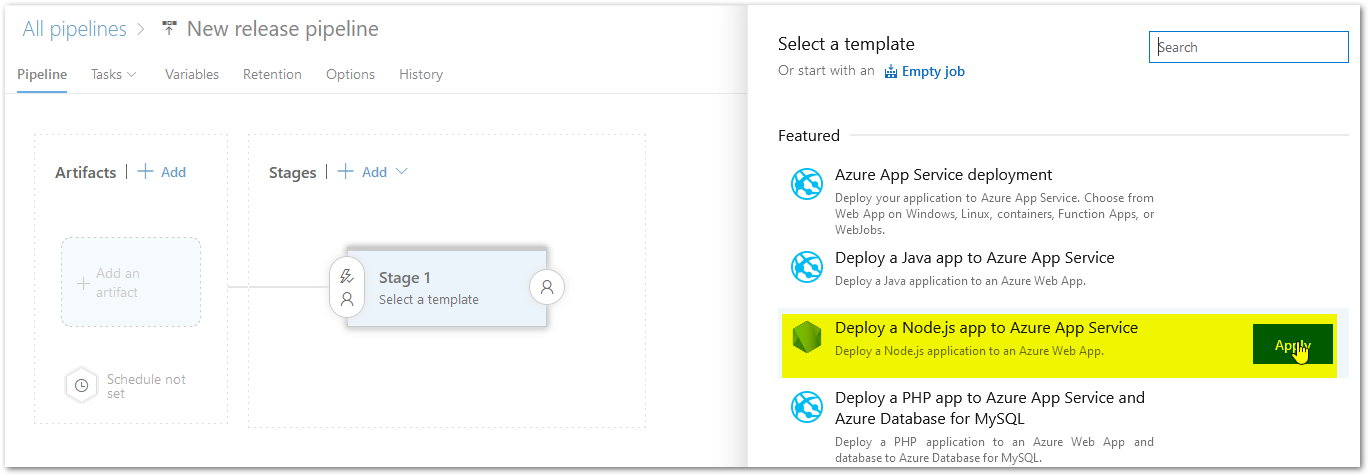
Select NodeJs as a template.
Give a name for stage, like test, dev, or pre-prod whatever. Then close this popup.
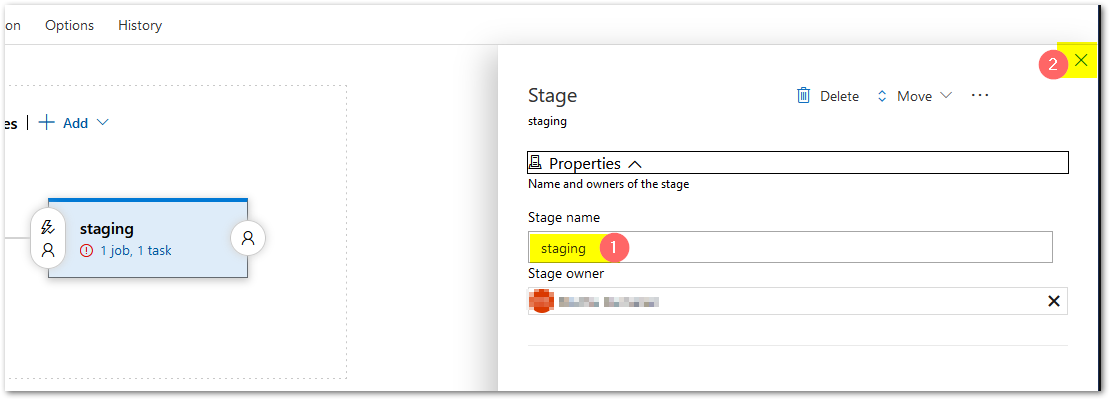
Name for the release pipeline
- Select Artifact
- Select build pipeline
- Give a source alias
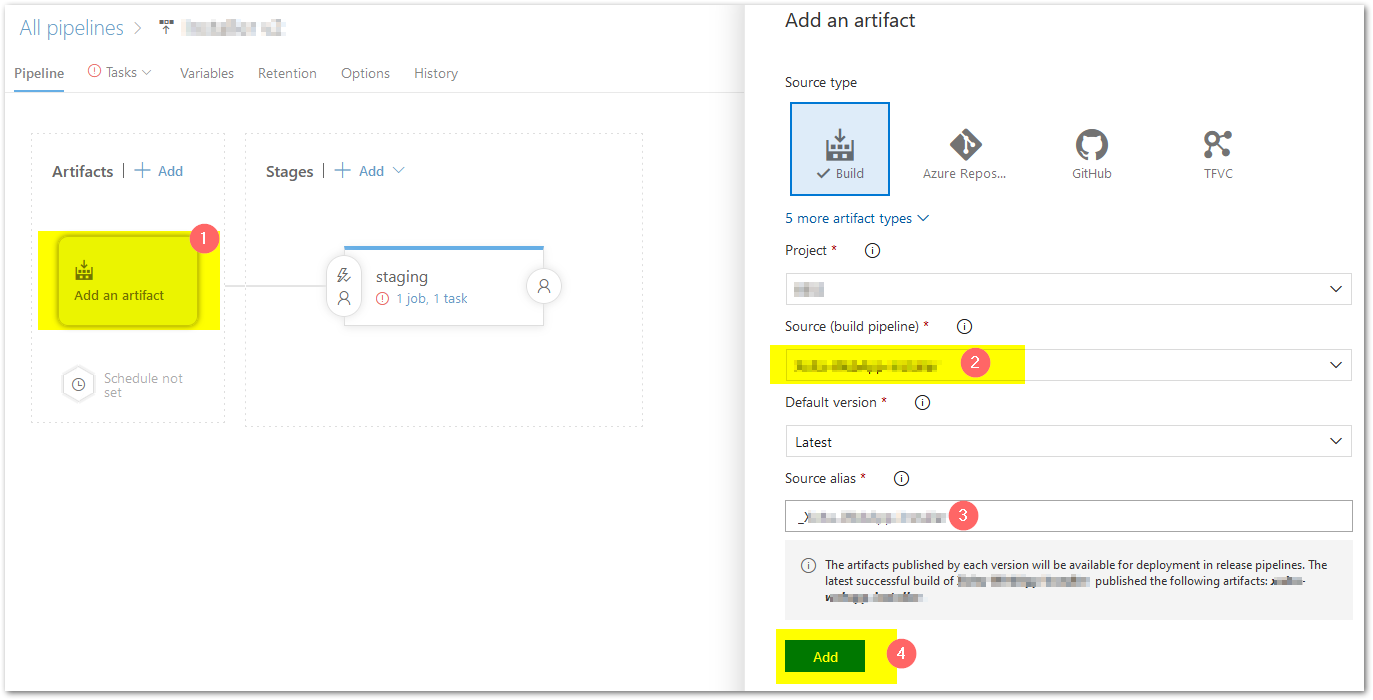
- Select staging
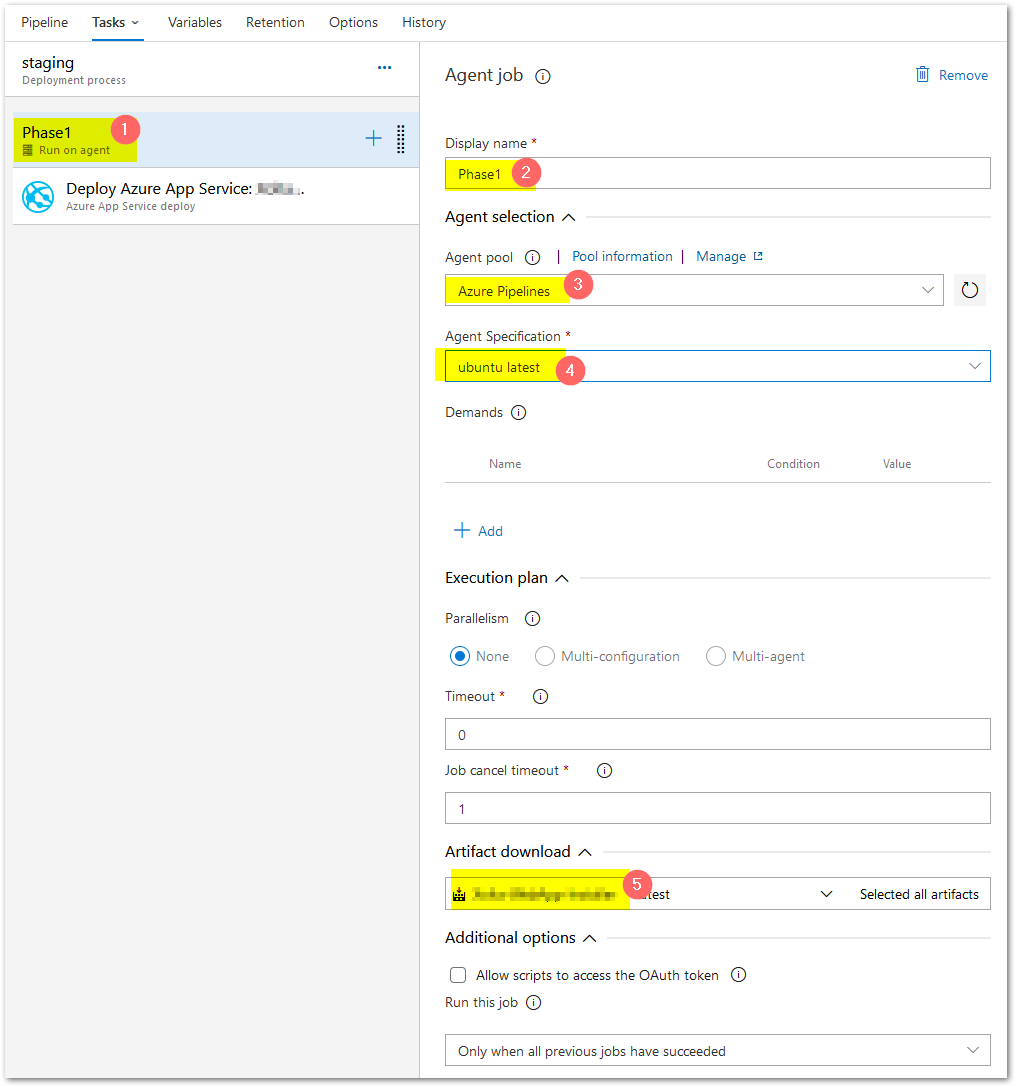
- Go to tasks tab
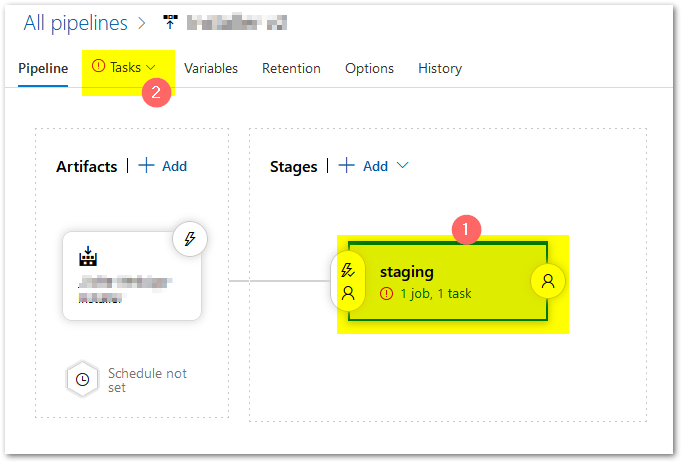
In parameter section click unlink all. I don’t have that in the below screen.

- Select run on agent
- Give a name for display
- Select azure pipelines
- Select
ubuntu latest - Ensure your artifact selected
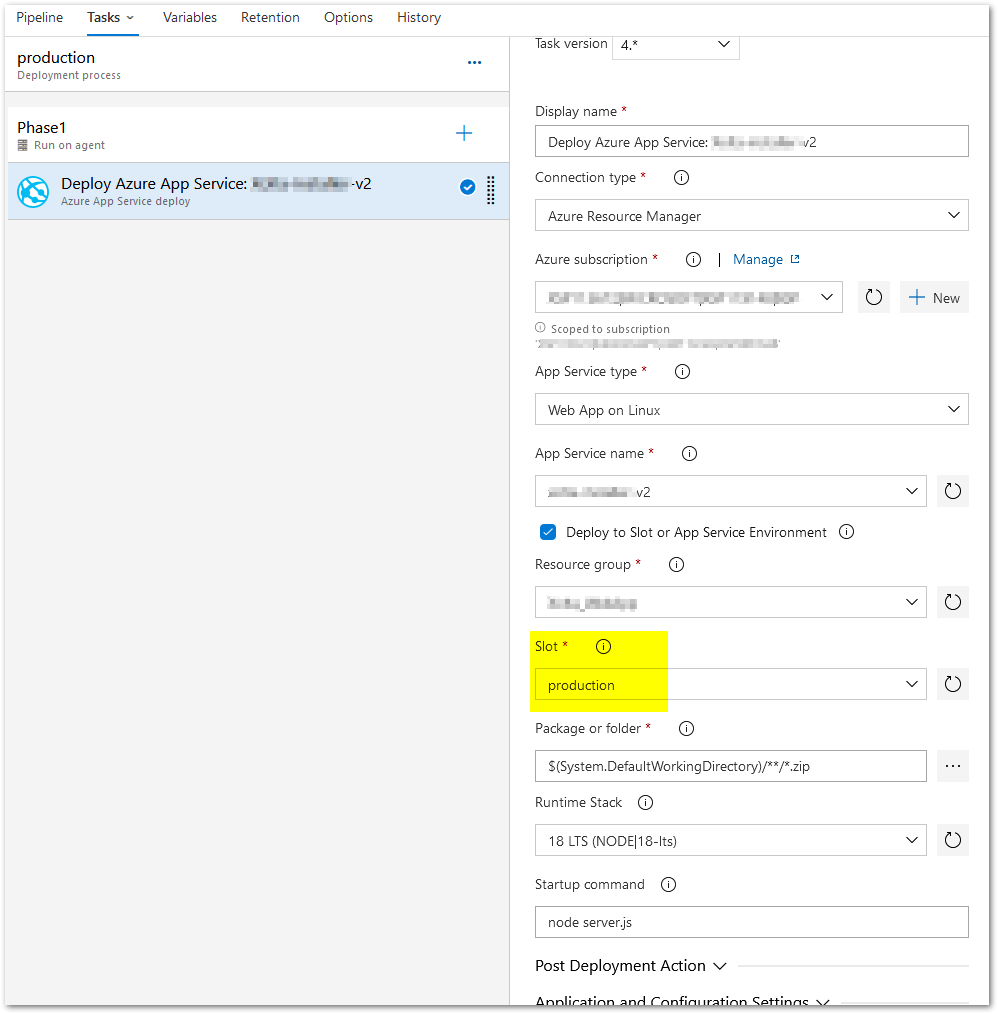
Make changes in the Deploy azure app service like below image
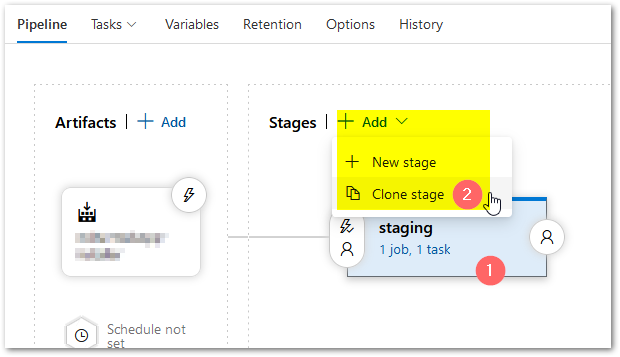
Create production release pipeline
Clone staging to create production release
Change the stage name as production
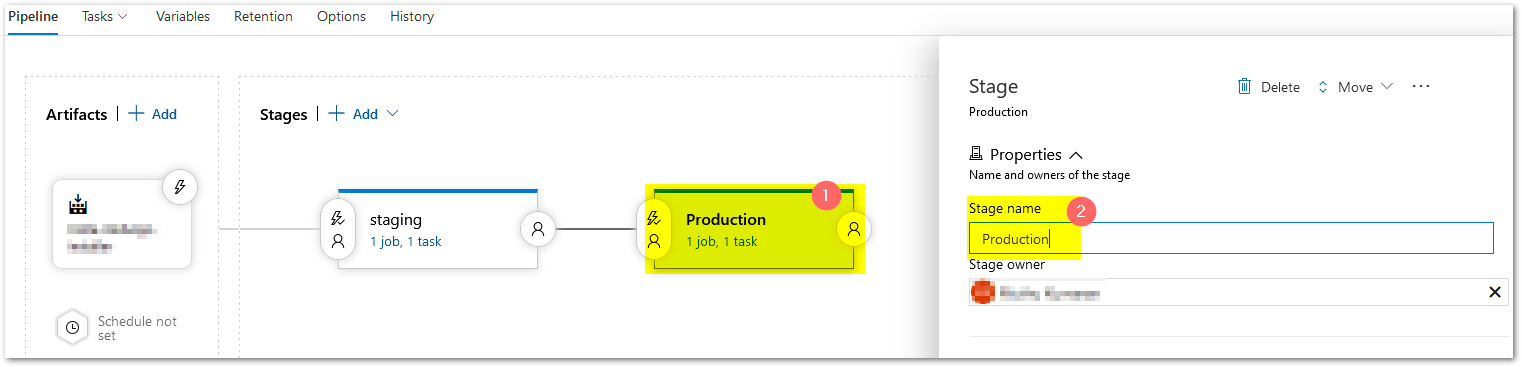
It’s important to change the production’s slot as production.
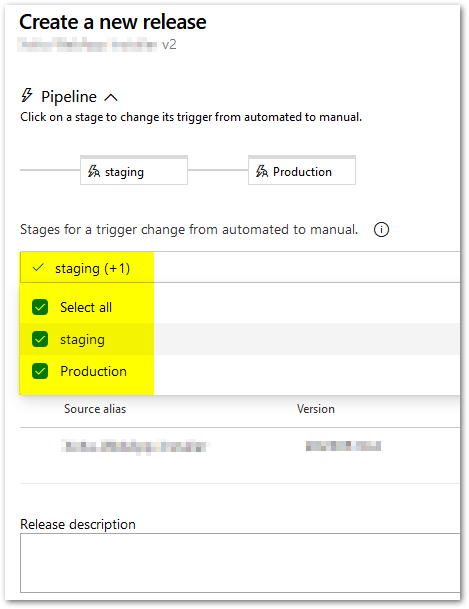
Create relase
Select all, we will do manual trigger.
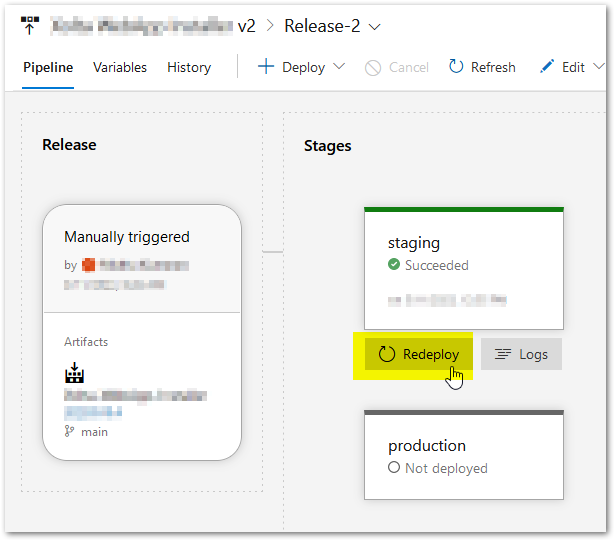
Once created the release, click on name to open
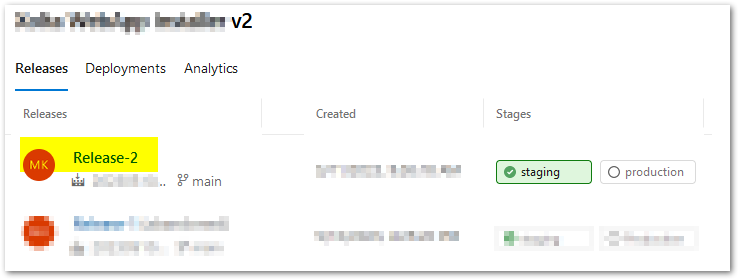
I have already deployed, so it is showing as redeploy, but first it should be deploy just click to deploy.
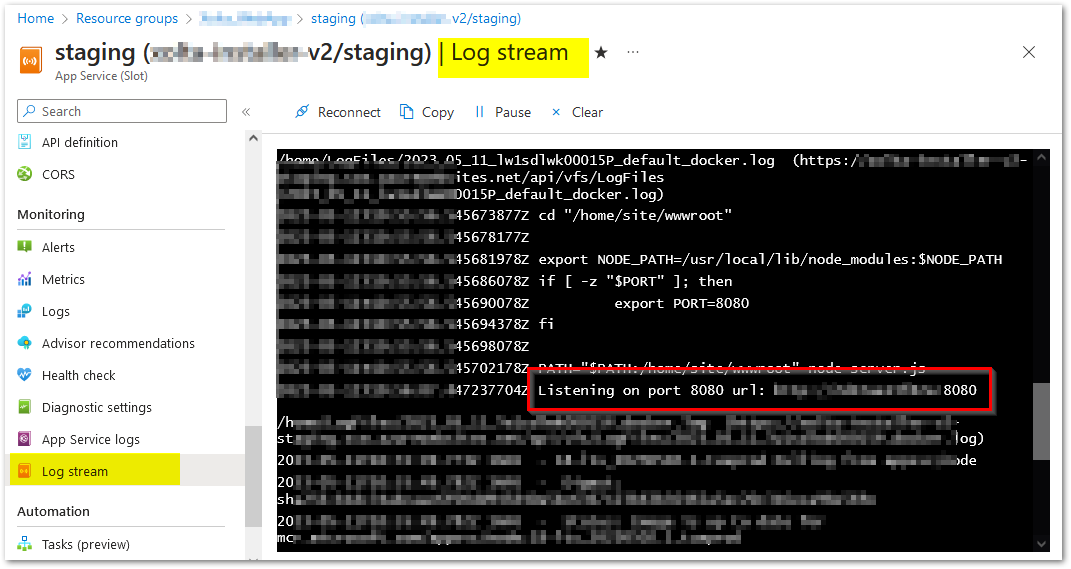
Once deployment done, we can see the log in Log stream
Conclusion
By following these steps, you can successfully deploy your Next.js app using Azure DevOps. This automated deployment process ensures consistency and reliability in your deployments, allowing you to focus on building and improving your application.